
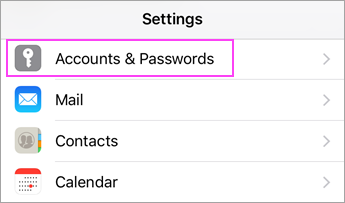
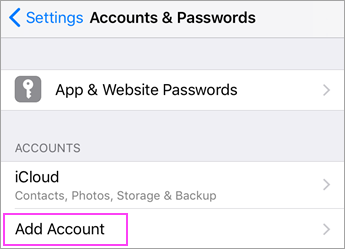
Go to your device’s Settings, scroll down and tap Mail > Accounts >Add Account.

Select Exchange.
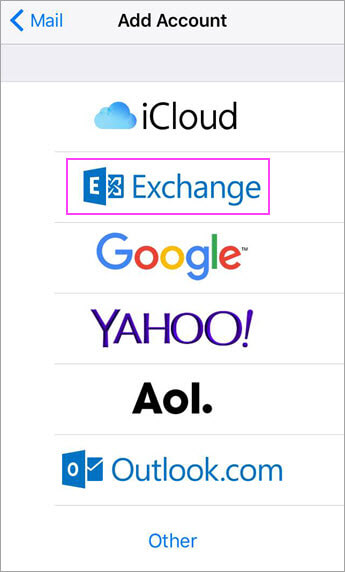
Enter your Microsoft 365 email address, password, and a description of your account. Tap Next.
Note: Your email address should be your Microsoft 365 business account or school account. Such as you@contoso.cn.

If you’re prompted to enter server settings, enter the following and tap Next.
Email: your full email address.
Server: partner.outlook.cn
Username: your full email address.
Password: email account password.
The Mail app may request certain permissions such as accessing your calendar and contacts. To agree, tap Yes.
Then choose the apps you want your email account to sync with your iOS device and tap Save.
Now you’re all set to go!
Android mail apps may look different across different devices, and these directions may not exactly match the options you see. Use these steps as a guide or consult the manufacturer’s help for your particular device.
| For easy email and calendar management, we recommend you set up email in the Outlook for Android mobile app. |

Are you using AOL mail? If so, this page can’t help you! Please contact AOL support for help. This page and the settings available on this page are for Outlook.com and Microsoft 365 for business users only. |
Choose your built-in Android email app:
Before you begin, update the Gmail app to the latest version:
Open the Google Play Store app on your phone or tablet.
Type “Gmail” into the search bar and then select Update.
Note: If the update option is not available, you’re already on the latest version.

Open the Gmail app.
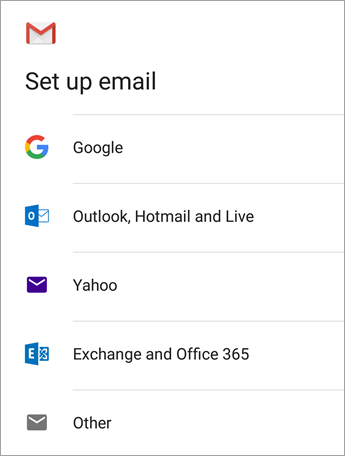
Tap the menu icon in the upper left corner > Settings > Add account > Exchange and Microsoft 365.
Important: Do NOT choose “Outlook, Hotmail, and Live” unless you want to sync email only and not calendar/contacts.

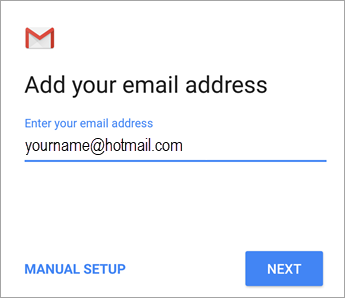
Enter your full email address and tap Next.
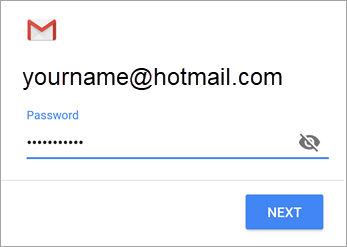
Enter your password and tap Next.

Follow steps for your account type:
Outlook.com users: skip this step
Exchange or other accounts: you may have to ask your IT admin or email provider for server settings and set up your account manually
Microsoft 365 work or school: you may see a Redirect request screen. Tap OK.

On the Incoming server settings screen, change your server to outlook.office365.com.

Follow any prompts you may get for security or device permissions, sync settings, and more.
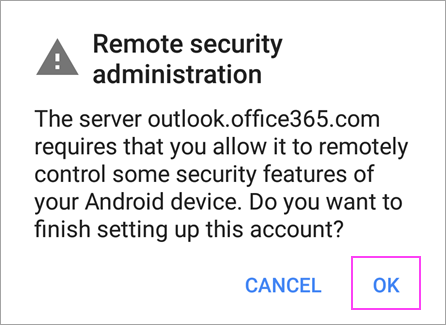
If you have a Microsoft 365 work or school account, you may also be asked to confirm Remote security administration and approve additional security measures. In this case, choose OK or Activate.

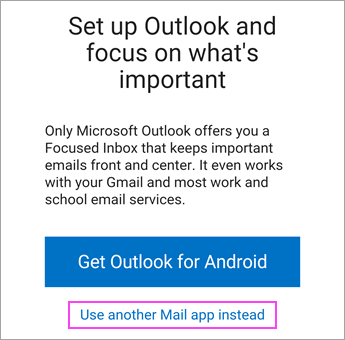
Go to the inbox you just set up. If you see an email that says “Action Required to Sync Email,” open it and tap Use another Mail app instead.
If you don’t see this message and emails are syncing, skip this step.

Pull down the Android notification bar by swiping down from the top of your screen.
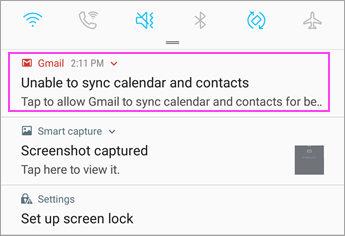
If you see a notification that reads “Unable to sync calendar and contacts,” tap it. Then tap Allow to give access and you’re done!
Note: If you don’t see a sync error, verify your calendar and contacts are syncing.
You can download the Outlook Apps from your device either via the Google Play Store or the Apple App Store.
There are two ways to get Office on your Android phone or tablet:
You can install the new Office mobile app that combines Word, Excel, and PowerPoint into a single app, and introduces new mobile-centric features to view, edit and share files without the need to switch between multiple apps. Learn more.

Or you can install Office apps individually:
Notes:
If you’re using Office 365 operated by 21Vianet, make sure you download the Office for Android apps from the local Android Store.
Looking to set up your Microsoft 365 email? See Set up email on an Apple device with Office 365 operated by 21Vianet.


Note: Using a Chromebook? You can install Office mobile apps for Android on your Chromebook if you have the Google Play Store or use Office Online if you have the Google Web Store.
Use the Office mobile apps to work from anywhere, just sign in with a free Microsoft Account or a Microsoft 365 work or school account. With a qualifying Microsoft 365 subscription, you’ll have access to the app’s extra features.
Set up Office apps for the first time:
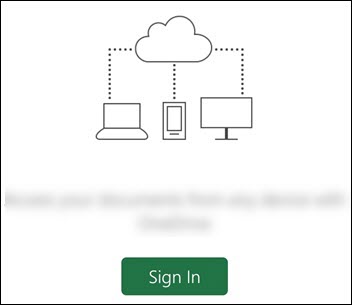
Open an Office app like Excel.
Sign in with your Microsoft account, or Microsoft 365 work or school account.
Note: If using Office 365 operated by 21Vianet, enter your email address and password associated with your Microsoft 365 operated by 21Vianet subscription and sign in.
If you sign in with a Microsoft account that’s associated with Office 2016 or Office 2019, you may get the option to upgrade to Microsoft 365.
Note: If you don’t have a Microsoft account, you can create one for free.
Follow the instructions to purchase a plan, or select Maybe later if you want to use the apps without a subscription.
Note that you get extra features if you use a Microsoft 365 subscription.
If you have other Office apps installed on your Android device, your account and OneDrive files will be automatically added.
To add another account, tap Open (or Open other documents if you’re on a tablet) > Add a place.
If you are using OneNote, tap Settings > Accounts.
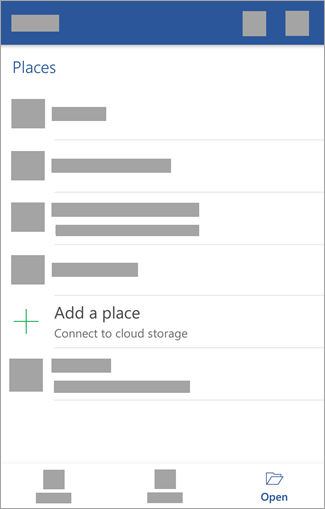
Choose the cloud service you want to add, such as OneDrive for business or Dropbox.

Enter the email address and password that you use to sign in to that service.
You’re done!

For step-by-step instructions, choose the apps you want to set up on iOS

Note: On an iPad Pro? The Office app is ready for the iPad Pro. You can now download a single Office mobile app (which combines Word, Excel, and PowerPoint) from the App store. Also see What can you do in the Office apps with Microsoft 365 for more details.
Before you begin, make sure your PC or Mac meets the system requirements.
If you are reinstalling Office, you have already redeemed a product key, or you are installing Office at work or school and know you have a license, then go to the section sign in to download and install Office.
However, if this is the first time you’re installing Office, you may have some pre-installation steps to do first. Expand the Learn more section below for more info.
Sign in to download and install Office
Sign in and install Office
Go to www.office.com and if you’re not already signed in, select Sign in.
Note: If you’re using Microsoft 365 operated by 21 Vianet, sign in with your work or school account to login.partner.microsoftonline.cn.
If you’re using Microsoft 365 Germany, sign in with your work or school account to portal.office.de.Sign in with the account you associated with this version of Office. This account can be a Microsoft account, or work or school account. I forgot the account I use with Office
After signing in, follow the steps that match the type of account you signed in with.
You signed in with a Microsoft account

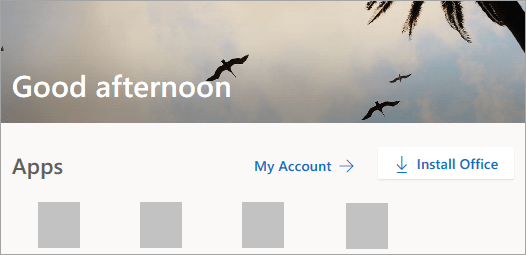
From the Office home page select Install Office to start the download.
You signed in with a work or school account
From the Microsoft 365 home page select Install Office (if you set a different start page, go to aka.ms/office-install).
Notes:
For Microsoft 365 operated by 21 Vianet go to login.partner.microsoftonline.cn/account.
For Microsoft 365 Germany go to portal.office.de/account.
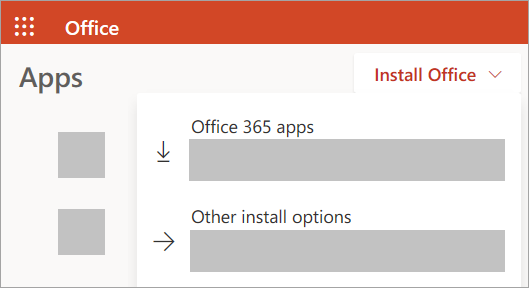
Select Office 365 apps to begin the download.
Note: Don’t see an install option after signing in? There could be an issue with your account. Select Need help? from above and review the issues listed in the section Account questions.
Follow the instructions below to complete installing your Office apps.
Install Office
Once the download has completed, open Finder, go to Downloads, and double-click Microsoft Office installer.pkg file (the name might vary slightly).
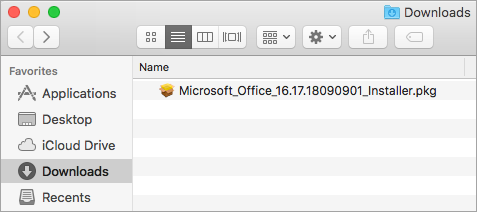
Tip: If you see an error that says the Microsoft Office installer.pkg can’t be opened because it is from an unidentified developer, wait 10 seconds and move the downloaded file to your desktop. Hold Control + click the file to launch the installer.
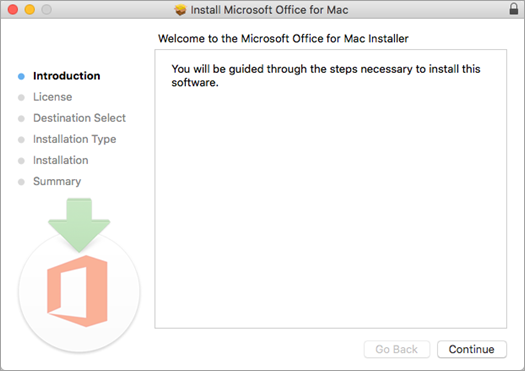
On the first installation screen, select Continue to begin the installation process.
Review the software license agreement, and then click Continue.
Select Agree to agree to the terms of the software license agreement.
Choose how you want to install Office and click Continue.
Review the disk space requirements or change your install location, and then click Install.
Note: If you want to only install specific Office apps and not the entire suite, click the Customize button and uncheck the programs you don’t want.
Enter your Mac login password, if prompted, and then click Install Software. (This is the password that you use to log in to your Mac.)

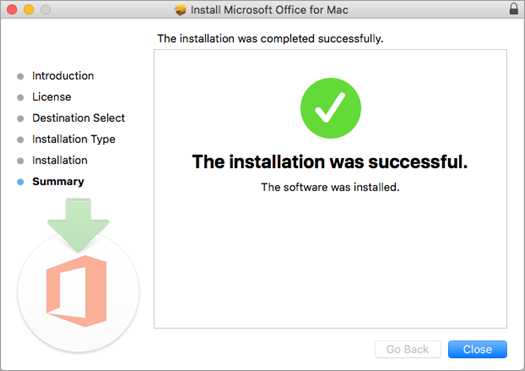
The software begins to install. Click Close when the installation is finished. If Office installation fails, see What to try if you can’t install or activate Office for Mac.
Launch an Office for Mac app and start the activation process
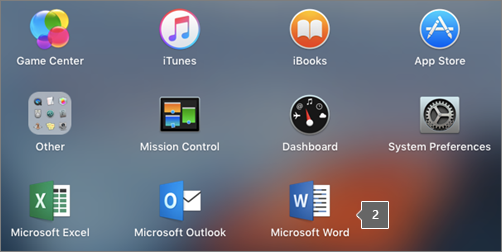
Click the Launchpad icon in the Dock to display all of your apps.

Click the Microsoft Word icon in the Launchpad.
The What’s New window opens automatically when you launch Word. Click Get Started to start activating. If you need help activating Office, see Activate Office for Mac. If Office activation fails, see What to try if you can’t install or activate Office for Mac.

Installation notes
Installation notes
How do I pin the Office app icons to the dock?
Go to Finder > Applications and open the Office app you want.
In the Dock, Control+click or right-click the app icon and choose Options > Keep in Dock.
Sign in and install Office
Go to www.office.com and if you’re not already signed in, select Sign in.
Note: If you’re using Microsoft 365 operated by 21 Vianet, sign in with your work or school account to login.partner.microsoftonline.cn.
If you’re using Microsoft 365 Germany, sign in with your work or school account to portal.office.de.Sign in with the account you associated with this version of Office. This account can be a Microsoft account, or work or school account. I forgot the account I use with Office
After signing in, follow the steps that match the type of account you signed in with.
You signed in with a Microsoft account
From the Office home page select Install Office to start the download.
You signed in with a work or school account
From the Microsoft 365 home page select Install Office (if you set a different start page, go to aka.ms/office-install).
Notes:
For Microsoft 365 operated by 21 Vianet go to login.partner.microsoftonline.cn/account.
For Microsoft 365 Germany go to portal.office.de/account.
Select Office 365 apps to begin the download.
Note: Don’t see an install option after signing in? There could be an issue with your account. Select Need help? from above and review the issues listed in the section Account questions.
Follow the instructions below to complete installing your Office apps.
Install Office
Once the download has completed, open Finder, go to Downloads, and double-click Microsoft Office installer.pkg file (the name might vary slightly).
Tip: If you see an error that says the Microsoft Office installer.pkg can’t be opened because it is from an unidentified developer, wait 10 seconds and move the downloaded file to your desktop. Hold Control + click the file to launch the installer.
On the first installation screen, select Continue to begin the installation process.
Review the software license agreement, and then click Continue.
Select Agree to agree to the terms of the software license agreement.
Choose how you want to install Office and click Continue.
Review the disk space requirements or change your install location, and then click Install.
Note: If you want to only install specific Office apps and not the entire suite, click the Customize button and uncheck the programs you don’t want.
Enter your Mac login password, if prompted, and then click Install Software. (This is the password that you use to log in to your Mac.)
The software begins to install. Click Close when the installation is finished. If Office installation fails, see What to try if you can’t install or activate Office for Mac.
Launch an Office for Mac app and start the activation process
Click the Launchpad icon in the Dock to display all of your apps.
Click the Microsoft Word icon in the Launchpad.
The What’s New window opens automatically when you launch Word. Click Get Started to start activating. If you need help activating Office, see Activate Office for Mac. If Office activation fails, see What to try if you can’t install or activate Office for Mac.
Installation notes
Installation notes
How do I pin the Office app icons to the dock?
Go to Finder > Applications and open the Office app you want.
In the Dock, Control+click or right-click the app icon and choose Options > Keep in Dock.